Gene Wenger's Ham Loaf and Stuffed Chicken Thighs
Smoked on a Meadow Creek PR60T Pig Roaster

In this blog post you'll get my illustrated step-by-step instructions for cooking a big tasty batch of ham loaves and stuffed chicken thighs. I'm using my Meadow Creek PR60T Pig Roaster for this recipe.
Recently, we cooked a case of stuffed chicken thighs and 30 pounds of Gene Wenger's ham loaves for an event, and my PR60T pig roaster trailer was the smoker of choice for this cook.
Whether you're looking for recipe ideas or you're in the market for a quality handmade smoker that is versatile, affordable, and perfect for feeding small crowds, you'll want to keep reading...

The Meadow Creek PR60T is perfect for traveling and cooking on-site, but it's also a sweet smoker for backyard and patio use. Even though the PR series was originally designed as whole pig roasters, they do an exceptional job as low and slow smokers too. A few things I appreciate about this cooker is the working height, how steady it is to operate, and the space it gives me when cooking for a crowd.

More Stories About Meadow Creek Pig Roasters
These smokers make it a breeze to cook nearly anything. Besides whole pigs, you can cook a huge variety of foods on a Meadow Creek pig roaster—easily and efficiently.

Are you looking for an affordable and practical charcoal smoker with room to cook for 100 people or more? Our PR series cookers are versatile and easy to use, making them a perfect choice for both backyarders and anyone cooking for crowds.

“The construction of the PR60 is unbelievably tight and held heat better than I expected. We can't wait til we can have 70 more people over for BBQ.”
- KGJ -
Firing the PR60T
For this recipe, I’m using my Meadow Creek PR60T Pig Roaster fired with 30 pounds of 100% hardwood charcoal briquettes and 6–8 chunks of pecan wood. My target temperature was 225 degrees F.
Step 1: Remove the cooking grate and drip pan.
Step 2: Spread 100% hardwood charcoal briquettes in the bottom of the roaster and toss some smoking wood chunks or log splits on top. The amount of charcoal you use will depend on the weather and how long the cook will take. If the day is overcast or windy, you'll need to use more fuel. 80 pounds of 100% hardwood briquettes should be enough to last 14–16 hours. 30 pounds was enough for this 6-hour cook.
Charcoal Vent Tips: On a shorter burn where the charcoal is not deep enough to cover the charcoal vent, remove it from the cooker or set it in the middle of the bottom of the cooker, parallel with the cooker, creating two even "paths" of charcoal. If you're using enough charcoal to cover the vent, set the vent at an angle, aligning the ends of the channel with the outside vents to let more air travel through the bottom of the cooker.
Step 3: Light the charcoal in each end of the roaster with a propane torch. Leave the lid open for a few minutes to let the charcoal get well lit.
Step 4: Replace the drip pan and cooking grate and close the lid with the top and bottom vents open all the way.
Step 5: Once the roaster gets within 15 degrees of your target temperature, close both bottom sliding vents to 1" open. If you have a pullout with the round vents on one end, close those vents to the halfway open position. If the roaster temperature rises above your target temperature, adjust the top vents a little bit at a time to stabilize and maintain the target temperature. Start by adjusting one top vent on each end to the 3/4 open position. A little adjustment on the top vents makes a big difference.
What if the roaster won't get up to temperature? There are a few variables involved in running a charcoal cooker, so it's hard to give a cut-and-dried setting for operating a charcoal roaster like this at a certain temperature. If it's an overcast day, be prepared to use more charcoal or open the vents more than you're used to. It also helps to open the lid for 5–10 minutes to let the fire get more established and stir the burning coals around to give them more oxygen.
If the roaster is running too hot, try to keep the lid closed as much as possible.
As a rule, running this cooker is a piece of cake, and if you add enough fuel for the length of your cook, you won't usually need to mess with the fire once it's up and running. However, I highly recommend the optional charcoal pull-out in case you need to stoke the fire or add/remove charcoal or wood.
With a Flame Boss or Other Temperature Controller: After lighting the charcoal, clip the temperature probe onto the cooking grate and close the lid with the vents open all the way, just as you would when firing it without the Flame Boss. When the roaster gets within 15 degrees of your target temperature, hook up the Flame Boss, and close all the vents. Set the Flame Boss to your target temperature and let the Flame Boss handle it from there. (A Meadow Creek pig roaster requires two Flame Boss fans.)

Lighting the charcoal with a propane torch

It takes about 10 or 15 minutes in each location to get the charcoal lit

Charcoal lit in both ends, ready for wood
Note: If the charcoal isn't deep enough to cover the charcoal vent piece in the middle, remove the vent or set it in the cooker straight instead of at an angle as I did here to create more even heat.

Lit charcoal close-up

The drip pan

The food-grade T304 stainless steel cooking grate
Cooking the Ham Loaf
Gene Wenger's Ham Loaf is famous here in Pennsylvania, especially in Lancaster County. Smoking it like this takes it to a whole new level over cooking it in the foil pans in an oven. The sticky, savory, smoky surface on this home-style entree is worth writing home to Grandma.
Tip: If you have grilling racks with smaller spacing, set the loaves on them to keep the meat from falling through the grate. I've done it either way and you can get by without, but they do sink into the grate a bit. In my opinion, it creates more yummy bark on the bottom.
Optional: A few minutes before they are done, glaze them with your favorite barbecue sauce, such as Meadow Creek Hickory Smoked Sauce.

Gene Wenger's Ham Loaves

Removing the loaves from the pans
Note: It helps if they are still partially frozen.

Seasoning the loaves

These were thawed, so it was a little tricky to keep their form while seasoning all the sides.

Ready for the smoker

I seasoned these with Meadow Creek Black Pepper Brisket Rub

Arranged on the cooking grate
Tip: If you have grilling racks with narrow spacing, it would help keep the meat from falling through the grate.

Cooking the Stuffed Chicken Thighs
The organizers for the event we were cooking for wanted a boneless chicken option, so we went with boneless thighs and stuffed them with mushroom, onion, spinach, and cheese to make them a bit more fancy.
Stuffing Ingredients
Mix the stuffing in a bowl up to a day in advance. Refrigerate it until you're ready to use it.
How to Assemble and Cook the Stuffed Chicken Thighs
A Meadow Creek PR is an excellent choice for cooking these. Some of the cheese will push out as they cook, but it's minimal.
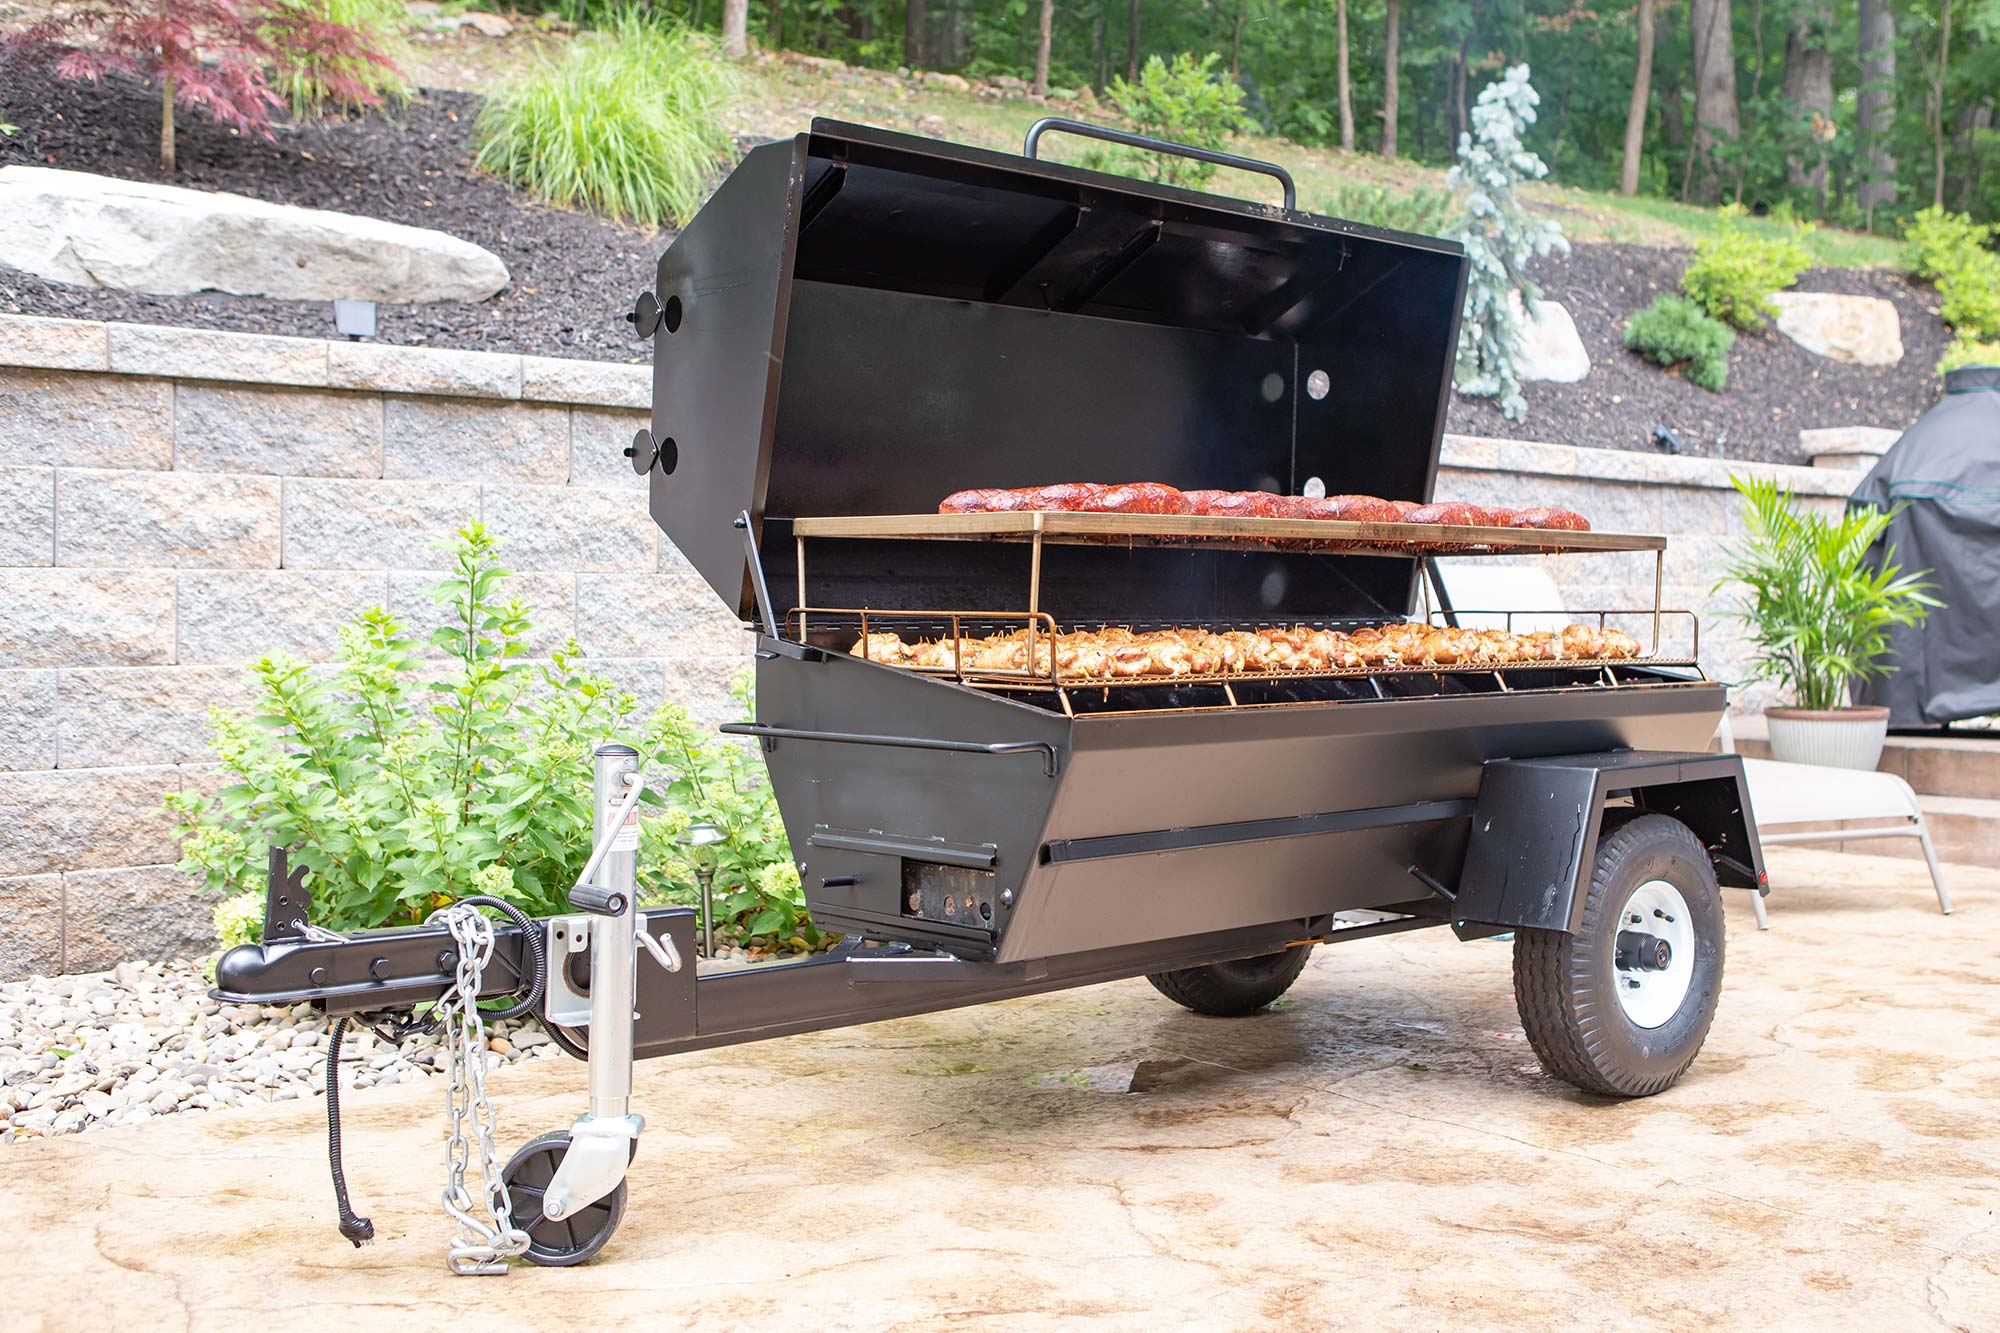
Important: If you put the thighs onto the smoker a couple of hours after the ham loaves like I did, it's important to put the chicken on the bottom so it doesn't drip raw juices onto the ham loaf when the ham loaf is nearly done cooking. I moved the ham loaves to the top grate to make room for the chicken, but you can start the ham loaves on the top shelf instead.

Prepared onions, mushrooms, and spinach

Stuffing

Trim the boneless thighs to remove loose pieces of meat and to square them up a bit.

Ready for stuffing

Season both sides of the thighs

Boars Night Out Double Garlic Butter rub is excellent on chicken!

Stuffing on thighs

Stitch the thighs with two toothpicks each.

Push the toothpick through the top edge, wrap it snugly around the bottom edge, and press the toothpick into the bottom portion to secure the stuffing.

Roughly how it should look

Ready for the smoker

Roughly 75 stuffed chicken thighs from a 40-pound case of boneless thighs
Here are a few more photos of the ham loaves and chicken thighs cooking on the PR60T Pig Roaster...

1.5 pound ham loaves

The PR60 standard grate has more than enough room for 20 of these.

Adding the second tier grate

Developing a beautiful color

Ham loaves moved to the top and the chicken added. The entire case of chicken fit on the bottom grate nicely.

Doors in lid make it handy to check the meat without opening the lid

Stuffed chicken thighs

Running at 225 degrees F

Finished product

Click here to browse more photos, features, and specs on our PR series roasters. Choose a model and then click on "customize" to see available upgrades and suggested retail prices: